Table of Contents
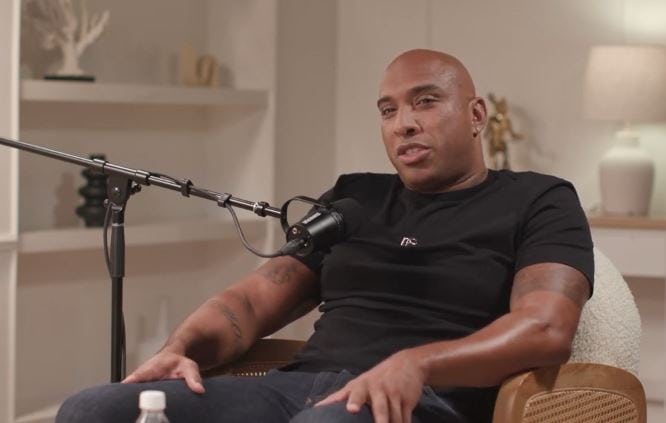
Momo—the Swiss nightlife impresario behind Zurich’s Flamingo club and the Goodfellas brand—sits down for a candid YouTube interview about building 300 events a year, hosting Beyoncé, Rihanna, 50 Cent, Chris Brown, Swedish House Mafia, and more, and why he chose to sell his club at the peak before shifting his life to Miami. The conversation isn’t about charts; it’s about deal flow, timing, brand, and risk—universal principles that matter just as much to markets as they do to high-stakes nightlife.


In this piece, you’ll learn how Momo’s “sell at the top” mindset translates into exit discipline for traders, how cultivating asymmetric relationships becomes an edge pipeline, and why operational rigor (showing up, delivering, protecting the venue) maps directly to risk management. We’ll unpack how he engineered demand without chasing clout, kept standards when the room got noisy, and used timing, positioning, and narrative to compound returns—so you can turn his street-tested playbook into a practical trading strategy.


Momo Playbook & Strategy: How He Actually Trades
Core Edge & Thesis
This section turns Momo’s real-world dealmaking instincts into a market edge. You’ll define where your advantage comes from, how you’ll express it, and when to pass. Clarity here prevents random trades and keeps your focus on high-probability plays.
- Write a one-sentence thesis before any trade: “If X catalyst triggers Y flow, price should move Z% within T hours/days.”
- Only trade when two independent edges align (e.g., macro driver + technical structure); skip single-edge ideas.
- Pre-commit to the asset class and product that best expresses the edge (spot vs. futures vs. options) before viewing price.
- Demand asymmetry: aim for setups with ≥3:1 reward: risk or ≥55% win rate with ≥2:1 payoff.
- If you can’t name the counterparties likely on the other side (who are forced to buy/sell), you don’t have an edge—stand down.
Market Selection & Positioning
Momo built brands by choosing the right rooms at the right time; traders must choose the right markets and time windows. This is about where you hunt and how you pre-position before the crowd arrives.
- Maintain a “top 5” watchlist where your reads are consistently accurate; rotate monthly based on realized volatility and liquidity.
- Trade sessions where your edge historically performs (e.g., London open for FX, US cash for equities); avoid off-hours fills.
- Bias long/short by regime: use a simple rule—if 20D realized vol is rising and breadth is below 30%, favor short setups; else, favor longs.
- Only trade symbols with a spread ≤ 0.5× your planned stop size; widen stop or switch instrument if liquidity is thin.
- Map catalysts two weeks out (CPI, NFP, rate decisions, earnings); trade only if the market is mis-positioned into the event.
Setup Criteria (A-Setups Only)
Great operators run tight door policies; great traders run tight setup policies. This section locks down visual criteria so you’re not improvising mid-trade.

- Trend-pullback: Higher high + shallow retrace (38.2–50%) into 20/50 EMA confluence + decreasing pullback volume.
- Reversal-fade: Prior day range expansion + failed continuation at VWAP ±1.5σ + trapped breakout wicks.
- Breakout-retest: Multi-day base (≥5 days) + anchored VWAP from base low turning up + first retest of broken level.
- Mean-revert: Two-standard-deviation move away from 5D VWAP + intraday RSI(3) < 10 or > 90 + opposite delta divergence.
- If a setup lacks two of three confirmations (structure, flow, location), it’s not an A-setup—skip.
Risk Sizing & Exposure
Momo sold the club at the top because risk changed; you’ll size like an owner, not a tourist. Here, we convert conviction and volatility into concrete size and loss limits.
- Risk a fixed % of equity per trade (0.3–0.8% for day trades; 0.8–1.5% for swing) based on 20D realized vol buckets.
- Position size = (Account × Risk%) ÷ Stop distance (in ticks or implied move); round down to the nearest lot.
- Hard daily loss cap at 2.5× average trade risk; hit it and stop—no exceptions.
- Cut size by 50% ahead of binary macro prints unless you have a hedged structure (spreads, defined-risk options).
- If your thesis time window expires without target progress (e.g., +0.5R in half the planned time), reduce risk by half or exit.
Entry, Stop, and Target Rules
Nightlife lines move fast; so does price. This section nails the mechanics so you’re never guessing under pressure.
- Enter on confirmation at location: last pullback high/low, retest of broken level, or VWAP band touch; avoid chasing mid-range.
- Initial stop goes beyond the structure that proves you wrong (swing high/low, VWAP ±2σ, prior day’s extremes).
- First target at 1R to bank partial (25–33%); move stop to breakeven only after fresh structure forms in your favor.
- Trail using higher-low/lower-high swings or anchored VWAP slope; never widen stops.
- If slippage on entry is> 25% of your planned stop, pass and wait for the next rotation.
Trade Management & Adds
The best hosts scale winners, not rooms; apply the same to positions. Here, you’ll compound only when the market confirms you.
- Add only on fresh confirmation (break-retest or new higher-low/lower-high) with stop on the newest structure; never add from losers.
- Cap total exposure to 1.5× initial risk on a single idea unless the catalyst is still active and breadth confirms.
- If delta or tape stops confirming (stall at liquidity pools, repeated iceberg absorption), take half off and reassess.
- For intraday, flatten into the close unless the trade is catalyst-driven and aligned with a higher-timeframe trend.
- Scale out into obvious liquidity magnets: prior day high/low, weekly open, round numbers, options gamma levels.
Event & Narrative Trading
Momo engineered demand around headline talent; traders engineer around scheduled flows. Use narrative shifts to time entries before the crowd.
- Pre-write two scenarios for each event: “hotter-than-expected” and “cooler-than-expected,” including triggers and invalidation.
- If the consensus positioning is crowded one way, look for fade setups into the print; otherwise, trade continuation on confirmation.
- Execute only after the first post-event impulse and pullback; let the spread normalize before entering.
- If price fails to reclaim pre-event VWAP within your thesis window, abandon the idea—narrative didn’t stick.
- Limit event risk to one idea at a time; correlation bites hardest on data days.
Psychology & Process
A packed venue runs on rules, not vibes. This section keeps your head straight so the system does the heavy lifting.
- Pre-market checklist: regime (trend/vol), levels, catalysts, top 3 setups, max risk, and “do-not-trade” conditions.
- During trade: speak your thesis out loud in one sentence; if you can’t, flatten.
- Post-trade: log screenshot, thesis, execution, emotions (3 words max), and what would have made it an A+.
- Enforce a two-strike rule: two process violations in a session end your day.
- Weekly review: tag trades by setup and catalyst; increase size only on setups with ≥50-trade sample and stable expectancy.
Journaling Metrics & Feedback Loops
Clubs track door counts, bar tabs, and return visits; you’ll track edge health the same way. Measure what matters and iterate.
- Log expectancy by setup: win rate, average win, average loss, payoff ratio, and net R/ trade.
- Track pre-trade forecast error vs. actual move; reduce size on setups with rising error.
- Maintain a “graveyard” of invalid signals (fakeouts, news-driven anomalies) to refine filters.
- Use a rolling 20-trade window to decide promotion/demotion of setups between A, B, and the bench.
- If a setup drops below 1.3 payoff or 48% win rate for 40 trades, retire it until conditions change.
Playbook for the Week
Great operators plan the calendar; so should you. This converts everything above into a repeatable seven-day rhythm.
- Sunday: mark weekly levels, anchor VWAPs, and note catalysts; pre-write scenarios and invalidations.
- Mon–Thu: trade only A-setups; cap to 3 ideas per day; stop after 2.5× daily loss cap or 3 wins—protect mental capital.
- Friday: half size, focus on mean-reversion and range edges; flatten into close unless catalyst extends.
- Daily: 10-minute debrief—one improvement, one keep-doing, one avoid.
- Monthly: rotate the “top 5” symbols and re-bucket risk by realized volatility.
Size Like a Pro: Risk First, Position After Volatility
Momo treats risk as the product, not the afterthought. Before he even thinks about profit, he caps downside in hard numbers—risk per trade, daily loss stop, and max portfolio heat. He sizes positions only after checking current volatility, so the same thesis doesn’t blow up just because the tape is louder today. For Momo, if volatility doubles, size halves—simple, mechanical, and repeatable.
That discipline lets Momo survive cold streaks and press when conditions align. He scales entries only after the market confirms, never from a losing anchor that turns hope into hazard. His stop sits beyond the structure that proves him wrong, and he moves it only when a new structure forms in his favor. Momo wins by controlling exposure first, then letting asymmetric outcomes do the heavy lifting.
Allocate by Volatility, Not Ego: Adjust Exposure as Regimes Shift
Momo builds his allocation around the tape’s temperature, not his feelings. When realized volatility expands, he cuts size and shortens holding time so a normal swing doesn’t become an outsized drawdown. When volatility contracts, he scales up selectively because edges tend to follow through longer in calmer regimes.
Momo also staggers exposure across timeframes, so one burst of noise can’t nuke the whole idea. He’ll keep risk per trade constant but reduce the number of simultaneous positions when correlations spike. If the regime flips—say, from trending to choppy—he instantly retires trend entries and shifts to mean-reversion plays, without debating it. The rule is simple: the market sets the pace, and Momo matches his allocation to the rhythm, not his conviction.
Diversify Smart: Underlying, Strategy, and Timeframe Hedge Each Other
Momo treats diversification as an active hedge, not a checkbox. He splits risk across uncorrelated underlyings so one narrative can’t sink the boat—think GBPUSD trend swing paired with mean-reversion on an index and a catalyst trade on oil. He also diversifies by strategy—trend, breakout-retest, and fade—so when one edge cools, another usually heats up. Correlation gets checked daily; if two positions start moving as one, Momo cuts the overlap and frees risk for the strongest idea.
Timeframe is another hedge in Momo’s playbook. He’ll combine a high-timeframe swing with a tightly defined intraday scalp only if the scalp doesn’t depend on the swing’s outcome. Holding periods are staggered on purpose—hours, days, and sometimes weeks—to avoid stacking the same timing risk. If volatility compresses and everything starts chopping, Momo retires longer holds and concentrates on fast setups until the regime breathes again.
Trade the Mechanics, Not Your Predictions: Entries, Stops, and Exits
Momo doesn’t worship forecasts—he worships repeatable mechanics. He waits for the price to come to a pre-marked level, lets the tape confirm, then executes without drama. If the confirmation doesn’t show—no entry, no FOMO; the idea returns to the shelf. Stops live beyond the structure that proves Momo wrong, never inside the noise that first attracted him.
Exits are scripted before the click, so emotion can’t negotiate later. Momo takes partials at defined multiples of risk, trails behind new swing structure or VWAP shifts, and forbids widening stops under any circumstance. If momentum stalls where it shouldn’t, he dumps size proactively, not reactively. The point is simple: Momo lets the market vote in real time, and his mechanics translate those votes into clean entries, disciplined stops, and unemotional exits.
Choose Defined Risk When Uncertain; Reserve Undefined Risk for A-Setups
When conviction is mid-tier, Momo chooses defined risk so the downside is fixed and survivable. He’ll structure spreads, tight-stop futures, or micro contracts so a single gap can’t torch the account. If the catalyst is binary or the tape is jumpy, he pays for protection rather than pretending uncertainty isn’t there. Defined risk keeps him in the game when the market’s message is murky.
Undefined risk is earned, not assumed, and Momo only unleashes it on A-setups with clear structure and favorable volatility. He sizes smaller than usual on overnight holdings, widens stops beyond true invalidation, and requires multiple confirmations before scaling. If the trade fails to advance on schedule, he cuts it—no “give it room” rationalizations. The rule is simple: protect the downside when clarity is low, and only remove the training wheels when the market has already proven you right.
In the end, Momo’s edge isn’t mystery—it’s management. He treats risk like inventory, caps downside before chasing upside, and sizes only after measuring volatility so a normal swing can’t become a career-ending loss. He allocates by regime, not ego, rotating size, holding time, and even the number of simultaneous positions as the tape heats up or cools down. His diversification is deliberate: a mix of underlying, strategy, and timeframe so one narrative or timing error can’t sink the whole boat.
What truly separates Momo is mechanical execution. He trades levels and confirmation, not predictions, with stops set where the idea is objectively wrong and exits planned before the first fill. When uncertainty rises, he buys protection or constrains exposure; when clarity is earned, he carefully scales into A-setups without widening risk. Wrapped in daily checklists, post-trade reviews, and a ruthless “rules over feelings” mindset, Momo’s approach turns discipline into a repeatable edge—one you can lift directly into your own playbook starting today.

Related posts:
- Trader Strategy Spotlight: Trader Nick on Building Real, Steady Edges
- Trader Strategy Playbook: How a World Cup Futures Trader Finds Edge Over Wall Street
- NYC Day Trader Strategy: Carmine’s Risk-First Playbook
- Trader Psychology Strategy: Rande Howell’s Playbook
- Trader Strategy Roundtable: Inside SMB Capital’s Playbook
- Trader Strategy Playbook: Lessons from Lance Breitstein
- Trader Strategy Playbook: Lessons from Axel Rudolph
- Trader Strategy Roundtable: Inside the ICT Community’s Playbook
- Trader Strategy Playbook: Words of Rizdom with Ken Chigbo
- Trader Strategy Playbook: Mindset, Macro, and Discipline
- Trader Strategy Playbook: Lessons from The Viper Group’s Cal
- Trader Strategy Playbook: Chris Cathey on Rules That Actually Work
