Table of Contents
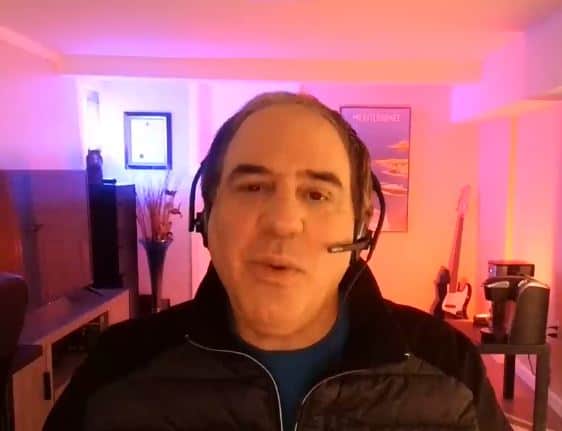
Michael Toma joins a no-fluff YouTube interview to talk shop on prop funding, trading discipline, and what it really takes to make it in 2024 and beyond. With 20+ years in the markets and hands-on coaching experience, Michael cuts through the hype—why prop firm “shakeouts” help serious traders, why most failures are self-inflicted, and why boring, rules-driven processes win. If you’ve been eyeing challenges or wondering how to scale without blowing up, this conversation is your playbook.
In this piece, you’ll learn Michael Toma’s core pillars: position sizing as the #1 risk lever, “compliance rate” (did you follow your plan?) as the true performance metric, and how to use moving averages as filters—not red/green entry lights. You’ll see how to adapt to trailing drawdowns, review losing streaks without ego, and treat backtesting as a context tool instead of a magic button. Michael also contrasts prop funding with managing private capital, and shows beginners why 1:1 to 2:1 targets can build confidence before chasing home runs. If you want to pass, keep, and scale funding the right way, this strategy-first breakdown is for you.
Michael Toma Playbook & Strategy: How He Actually Trades
Core Risk Framework (the job is survival first)
Here’s the backbone of how he approaches the game: protect the account, standardize decisions, and let the math compound. This section gives you the guardrails that keep small mistakes from becoming big problems and turns trading into a repeatable business.
- Define daily max loss = 0.5%–1.0% of account; hard stop trading for the day when hit.
- Cap per-trade risk at 0.25R–0.5R of daily max (e.g., if daily max = 1%, risk 0.25%–0.5% per trade).
- Pre-commit to a maximum of 3 red days per week; if you hit 3, you don’t trade again until the next week.
- Use only market conditions you can define (trend, range, chop); if you can’t label it in 5 seconds, you don’t trade it.
- Never widen stops. Exit where planned, every time.
Market, Session, and Timeframes (fish where your edge lives)
He narrows the universe to liquid instruments and predictable sessions. This cuts noise, tightens spreads, and makes your rules easier to obey.
- Trade 1–3 instruments only (e.g., ES, NQ, or one FX major); know their average true range and session rhythm.
- Pick one primary session (e.g., NY for indices/FX) and one backup; avoid “all day” trading.
- Use a top-down view: H4/H1 for context, M15/M5 for setup, M1/M2 for execution (if needed).
- Skip first 3–5 minutes after a major economic release; let spreads/volatility normalize.
Set up Filters, Not Predictions (let structure do the filtering)
He treats indicators as traffic lights, not crystal balls. Filters reduce bad trades; they don’t “call tops/bottoms.”
- Trade only in the direction of the H1 slope of a baseline MA (e.g., 50 EMA) and above/below a daily pivot bias.
- Require confluence: trend direction + structure (HH/HL for longs; LH/LL for shorts) + location (prior S/R, VWAP bands).
- If two of three filters disagree, pass the trade.
- Avoid counter-trend entries unless your written playbook has a defined reversal pattern with historical stats.
Entries: Precise, Small, and Repeatable (no heroics)
Entries are simple triggers executed where the risk is smallest. You’ll see the same mechanics, over and over.
- Long trigger: bull continuation candle off a level (prior high, VWAP, or 50 EMA pullback) with wick rejection; stop goes below the signal candle or structure swing, whichever is tighter.
- Short trigger: mirror of the long bear continuation candle, stop above the signal or swing.
- No trade if the stop distance > 0.5× current M15 ATR(14); you need room to breathe.
- Limit attempts: max 2 re-entries per idea; if both fail, the idea is invalid for the session.
Exits: Pay Yourself and Move On (risk first, reward second)
He defines exits before entry. Targets are modest early on to build a positive expectancy streak; runners come later.
- First scale at +1R; move stop to breakeven on remainder once +1R is printed intrabar close.
- Core target at 1.5R–2R unless a higher-timeframe level is closer; take the closer of the two.
- Time stop: if after 5 candles price hasn’t advanced half the initial risk, exit at market.
- News exit: flat at least 2 minutes before high-impact data unless your setup explicitly includes it.
Position Sizing Math (the real edge is sizing)
Sizing is the dial you can control. He keeps position size dynamic but rule-bound, so the account stays stable.
- Risk per trade = Account × %Risk. Example: $25,000 × 0.4% = $100 risk.
- Contracts/shares = Risk ÷ Stop size. If stop = 5 points and tick value implies $10/pt, size = $100 ÷ ($10×5) = 2.
- Reduce size by 50% after two consecutive losses; revert only after one clean +1R winner.
- Cap total open risk at 1.0× daily max; if you’re in one trade with 0.7× daily risk, your second trade can’t exceed 0.3×.
Prop-Firm Rules & Trailing Drawdowns (pass, keep, scale)
He optimizes around typical prop constraints: trailing drawdowns, daily loss limits, and consistency targets.
- Map firm rules on a one-pager: daily max, drawdown type (static vs. trailing), news restrictions, and scaling rules.
- Use a “buffer build”: target +3% before increasing size; until then, keep base size fixed.
- Trailing drawdown: secure equity bumps—withdraw or transfer profits when allowed to reset the trailing anchor lower relative to equity.
- Stop trading immediately after a big winner that brings you within 0.5% of the profit target; protect the evaluation.
Trade Management Playbook (mechanics over emotions)
He automates decisions with prewritten branches. That way, the chart can’t talk him into improvising.
- If price prints a strong opposite-color engulfing candle against your position and closes past your entry, cut risk by 50% immediately.
- If a “runner” hits 2R and H1 structure remains intact, trail behind the last two M5 swing lows/highs.
- If the spread widens > 1.5× average, cancel pending orders and wait for normalization.
- If slippage > 0.3R on two trades in a row, step down to limit orders at levels only.
Process & “Compliance Rate” (score the behavior, not the P&L)
He measures success by how well he followed the plan’s rules. P&L follows process, not the other way around.
- Define a checklist of 8–12 binary items (trend aligned, location valid, ATR within range, news window clear, risk sized, etc.).
- Log each trade’s compliance rate = checks passed ÷ total checks. Accept trade only if pre-trade compliance ≥ 80%.
- Weekly goal: ≥ 85% average compliance and < 5% “impulse trades.”
- If compliance drops below 75% for a session, stop trading and review immediately.
Playbook Stats & Backtesting (context, not prophecy)
He uses stats to understand behavior, not to overfit. The goal is to know your distribution so drawdowns don’t surprise you.
- Maintain rolling 50-trade stats for win rate, average R, max adverse excursion, and sequences (max L-streak).
- Require at least 200 historical occurrences of a setup before calling it “core.”
- If max L-streak historically = 6, pre-decide what happens at 4 (cut size), 5 (stop for the day), 6 (mandatory day off + review).
- Re-test quarterly; if expectancy falls below 0.25R for two consecutive quarters, demote the setup.
Journaling & Review (turn data into adjustments)
He treats journaling like a pilot’s logbook—short, structured, and focused on decisions over feelings.
- Journal fields per trade: market state label, setup name, screenshots (pre/post), entry/exit rationale, R-multiple, compliance score, and any rule you broke.
- Tag outcomes by cause (e.g., “premature exit”, “late entry”, “news violation”) to see patterns after 30–50 trades.
- Weekly: pick ONE lever to refine (e.g., entry timing), A/B test it the following week, and preserve all other variables.
Psychology: Pre- and Post-Market Rituals (less willpower, more routine)
He relies on rituals to remove randomness from decision quality. The aim is to sit down already disciplined.
- Pre-market (15 minutes): label market regime, mark two levels above/below, write “If/Then” scenarios for trend, range, and reversal.
- In-session: a 3-breath reset before any click; if heart rate or agitation spikes, step away for 2 minutes.
- Post-market: score energy (1–5), focus (1–5), and adherence (1–5); no charts after logging to avoid revenge research.
Capital Allocation & Scaling (earn the right to size up)
He scales slowly and only after process stability. Growth is stair-stepped, not linear.
- Size up by 25% only after 4 consecutive green weeks with compliance ≥ 85% and drawdown ≤ half of your historical max.
- Keep a “maintenance account” with a smaller size for experimentation; never test changes in your main account.
- Withdraw a fixed % of monthly gains (e.g., 30%) to both de-risk and reinforce the business mindset.
Red-Flag Conditions (when to sit out)
Knowing when not to trade is part of the edge. He defines “no-go” days upfront.
- Skip days where overnight range > 1.8× 20-day average or where H1 shows violent mean-reversion around VWAP.
- Skip instruments with scheduled rebalances/contract roll until volume normalizes.
- Skip your personal low-energy days: if sleep < 6 hours or compliance dipped yesterday, trade half size or not at all.
One-Page Daily Card (bring it together)
He boils everything down to a single card, so decisions are fast and consistent. Print it or keep it beside your platform.
- Today’s bias (trend/range), key levels, news windows, and allowed setups.
- Risk dial: daily max, per-trade risk, max concurrent risk, and size steps.
- Execution triggers, exit logic, and trailing rules.
- Stop criteria: hit daily max; 3 compliance violations; emotional spike noted twice.
Size Risk First: Daily Max, Per-Trade Limits, No Exceptions
Michael Toma builds every trading day around one idea: survival comes before returns. He sets a hard daily max loss and stops the moment it’s hit—no “one more trade” to win it back. Per-trade risk is a tiny slice of that daily cap, so a single mistake can’t sink the session. This structure removes emotion and turns each decision into a small, controlled experiment rather than a bet on conviction.
He also sizes positions from the stop outward, not the other way around. If the stop is wider, the position is smaller—simple math, zero ego. After two losses in a row, he cuts the size in half until a clean winner resets confidence. When volatility spikes or spreads widen, Toma auto-dials risk down, preserving mental capital and prop-firm buffers. The result is boring by design: steady drawdowns, fewer blowups, and more chances to let good trades work.
Trade The Regime: Trend Or Range, Not Confused Between
Michael Toma starts by labeling the market like a weather report: trending or ranging. If it’s trending, he leans with the slope and only takes pullbacks that respect structure; if it’s ranging, he fades edges and skips mid-range noise. He refuses to trade the “maybe” zone—when the chart can’t be labeled in five seconds, he stands down. That single decision cuts a huge percentage of low-quality impulses.
Once the regime is set, Toma keeps everything consistent: trigger, stop, and target logic match the environment. In trends, he lets winners breathe and expects clean higher highs or lower lows; in ranges, he takes profits faster and accepts more chop. He doesn’t argue with transitions—first a pause, then a switch to the new playbook after confirmation, never during the whipsaw. The payoff is clarity: fewer decisions, faster execution, and trades that fit the day instead of fighting it.
Let Mechanics Drive Entries; Ditch Predictions, Follow Repeatable Setup Rules
Michael Toma treats entries like a checklist, not a hunch. He wants objective alignment: higher-timeframe bias, level/structure, and a clear trigger candle—no trigger, no trade. Stops are placed where the idea is wrong, never where the P&L “feels” okay. If the stop distance is too wide for his risk, he simply passes and waits for the next setup.
Toma avoids calling tops or bottoms; he just executes the same mechanics when conditions match. He limits attempts to two per idea, so losing sequences don’t spiral. A time-stop forces him out if momentum doesn’t materialize within a few candles. The result is a portfolio of identical decisions where the edge comes from consistency, not prediction.
Allocate By Volatility: Scale Size Down In Choppy, Up In Calm
Michael Toma sizes positions based on the actual turbulence of the market, not his confidence level. When ranges are jagged and candles overlap, he trims the size and sometimes skips the next signal entirely. If the stop needs to be wider because volatility is elevated, he automatically reduces contracts so risk per trade stays constant. In calmer conditions with tighter stops, he gently increases size to keep the risk budget productive. Volatility dictates size; size never dictates the trade.
He tracks a simple volatility gauge (like ATR or session range) and uses preset bands—low, normal, high—to select a position-size tier. During news spikes or fast tape, he downgrades a tier or stands aside for a few minutes until spreads normalize. He also caps total open risk, so multiple trades in a choppy session can’t quietly stack into a big drawdown. This way, the account breathes with the market while Michael Toma keeps his risk steady and his head clear.
Prefer Defined Risk Plays; Cap Tail Exposure On Every Trade
Michael Toma is relentless about knowing the worst case before he clicks. He defines risk at entry with a hard stop placed where the idea is invalidated, not where the loss “feels okay.” If a level is too far and would force oversized exposure, he passes—no exceptions. He’d rather take a smaller position or skip entirely than leave tail risk open to a freak move.
He also manages tails after entry by capping open risk and using time-based exits when momentum stalls. If volatility spikes or liquidity thins, Toma reduces size proactively to keep the downside bounded. He never adds to losers and avoids martingale thinking that inflates tail exposure. The throughline is simple: protect the left side of the distribution first, and profitable right tails will take care of themselves.
Michael Toma’s core lesson is that trading is a process business—survival first, returns second. He anchors every decision to controlled risk: a hard daily max, small per-trade exposure, and strict no-widening of stops. From there, he filters the day into clear regimes—trend or range—so the playbook fits the tape rather than fighting it. Entries are mechanical and repeatable, placed where the idea is objectively wrong, not where the loss would “feel okay.” Exits are prewritten, with modest base targets, time-stops when momentum stalls, and the discipline to stand down when conditions don’t match the plan.
Equally important, Toma scales by volatility instead of confidence. When the tape is jagged or newsy, he automatically dials size down; when conditions are calm and stops are tighter, he gently size-ups while keeping total account risk bounded. He treats prop-firm constraints as design inputs—protect buffers, respect trailing drawdowns, and stop when near a profit target—so he can get funded and stay funded. The “compliance rate” is his scoreboard: follow the checklist, log every trade, review sequences, and fix one lever at a time. Put together, the message is simple and durable: define risk, trade the regime, let mechanics run the show, and use data to tune the engine. That’s how Michael Toma keeps drawdowns shallow, confidence intact, and the account positioned for the long run.


